
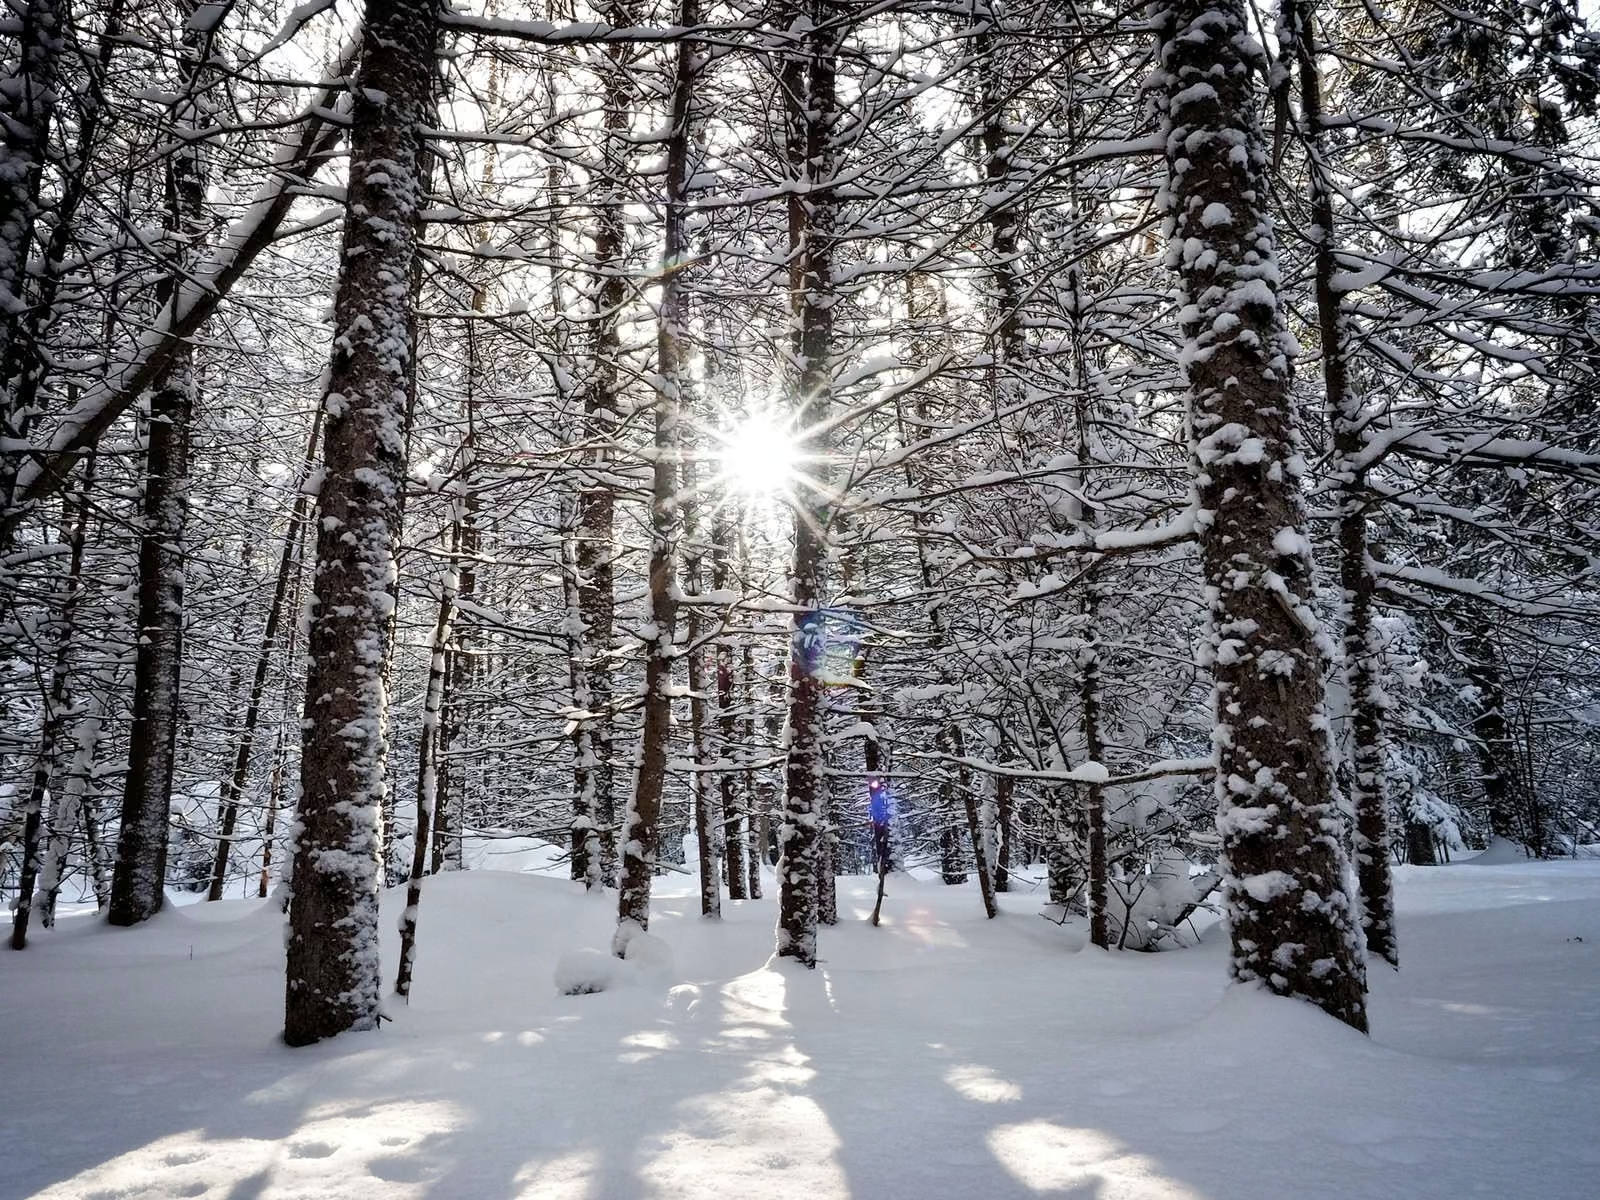
Essential Winter Photography Gear
Camera Protection Against Moisture and Cold Temperatures
Winter photography can be a thrilling experience, but it does come with its own set of unique challenges. Ensuring your camera is protected from moisture and the cold is critical. Consider investing in a rain cover or waterproof housing for protection against snow and ice. A silicone skin for your camera can also provide an extra layer of insulation. Keeping your gear dry will prevent damage and reduce the risk of condensation forming on your lens and inside the camera.
Extra Batteries and Their Proper Storage
Cold temperatures can significantly drain your camera’s battery life. Bring extra batteries and store them in a warm place, such as an inner pocket of your jacket. Lithium-ion batteries tend to perform better in cold weather compared to other types, but they still lose charge more quickly when exposed to freezing temperatures. Ensure each battery is fully charged before heading out and rotate them during the shoot to maximize their lifespan.
Appropriate Clothing and Hand Protection for Extended Shoots
Wearing the right clothing is crucial for staying comfortable and safe during long winter shoots. Dress in layers for better temperature control and invest in high-quality thermal wear. Don’t forget a pair of touchscreen-compatible gloves. These gloves allow you to operate your camera without exposing your fingers to the cold. Insulated boots, warm hats, and waterproof outer layers will keep you warm and dry. You can then focus on capturing beautiful winter scenes without discomfort.
Remember, taking the necessary precautions to protect both yourself and your equipment can make your winter photography experience enjoyable and productive. By being well-prepared, you can create stunning images even in the most challenging cold weather conditions.

Camera Settings for Snow
Exposure Compensation Techniques for Bright Snow Scenes
Photographing snow-covered landscapes can be tricky due to the reflective nature of snow, which can trick your camera’s meter into underexposing the scene. To counteract this, use exposure compensation to adjust the exposure value (EV). Typically, increasing the EV by +1 to +2 stops helps achieve a more accurate representation of a snowy scene. This adjustment ensures that the brightness of the snow is captured correctly, preventing it from appearing gray or dirty.
Optimal White Balance Settings for Winter Conditions
Winter scenes often have a bluish tint as a result of the snow, which can affect the color balance of your photos. To ensure that your images have accurate color representation, setting a custom white balance is critical. You can start by using a white balance preset like ‘Daylight’ or ‘Cloudy.’ However, manually setting the white balance with a gray card or adjusting the Kelvin temperature to around 6000K-7000K can provide more precise results. This technique helps maintain the natural colors of the snowy landscape and any other elements in the scene.
Recommended Aperture and Shutter Speed Combinations
Selecting the right aperture and shutter speed is crucial for capturing the intricate details of winter scenes. For snowy landscapes, a smaller aperture (f/11 to f/16) can provide a greater depth of field, keeping both the foreground and background in sharp focus. This is particularly useful when emphasizing the textures and patterns in the snow.
For shutter speed, consider the movement in your scene. To freeze falling snowflakes, a fast shutter speed (1/250s or faster) is essential. Conversely, for a dreamy, motion-blurred effect on falling snow, slower shutter speeds, such as 1/30s or slower, are recommended. Balancing the aperture and shutter speed with the correct ISO setting will help you achieve the desired exposure and capture stunning winter photos.
Transition to the next element: learn how to manage exposure in bright conditions. This will help you strike a balance in highly reflective snowy environments.
Managing Exposure in Bright Conditions
Using Histogram to Avoid Overexposure
Snowy landscapes are known for their bright and reflective surfaces, making it vital to manage exposure meticulously. The histogram on your camera is an invaluable tool. It visually represents the tonal range of an image, from shadows on the left to highlights on the right. In scenes dominated by white snow, monitor the histogram to ensure you avoid “clipped” highlights. Clipping happens when a portion of the histogram is jammed up against the right edge, indicating overexposed areas with lost detail. Aim to keep the highlights just inside the right boundary for a balanced exposure.
Working with Spot Metering in Snowy Landscapes
Spot metering is highly effective in snowy environments. This mode measures light in a small, specific area of the frame, letting you target the correct exposure for critical elements. For instance, when photographing a snow-covered tree, focus the meter on the tree instead of the snow. This helps capture the darker subject without the camera being fooled by the overwhelmingly bright background. Remember, spot metering requires practice, so experiment with different spots in the scene to find the optimal balance.
Balancing Highlights and Shadows
Balancing highlights and shadows in a winter scene can be challenging yet rewarding. The key is to avoid having either one dominate your image. When shooting in bright conditions, brackets your shots by taking multiple images at different exposures. This technique, known as exposure bracketing, can later be blended in post-processing to create an image with a well-balanced dynamic range. Additionally, using a graduated neutral density filter can help darken the bright sky while keeping the snow properly exposed.
With proper exposure management, your winter photos will boast detailed highlights and rich shadows. This attention to exposure sets the stage for beautiful and balanced winter photography.
Composition Techniques for Winter Scenes
Including Elements for Scale and Contrast
One of the challenges in winter photography is to convey the vastness and depth of the snowy landscapes. Including identifiable elements can provide a sense of scale and contrast to your images. Look for trees, buildings, or people in the frame. These elements can offer perspective and make the expansive white scenes more relatable. For instance, a lone hiker in a vast snow-covered plain not only provides scale but also adds a focal point that draws the viewer’s eye.
Utilizing Leading Lines in Snowy Landscapes
Leading lines are a powerful composition technique that draws the viewer’s eye through the image, and winter landscapes are perfect for this. Snow-covered roads, fences, or even the edge of a forest can act as natural leading lines. Use these lines to guide the viewer’s eye towards a point of interest, like a mountain peak or a sunset. Pay attention to how these lines are positioned in your frame; they should lead the eye towards the main subject, enhancing the overall composition.
Finding Patterns and Textures in Snow
Snow itself can create fascinating patterns and textures, making for compelling close-up shots. Look for undisturbed patches where the wind or falling snow has created intricate designs. The soft light of winter can emphasize these textures, adding depth and interest to your photos. Get close and play with different angles to highlight the unique patterns. Footprints, animal tracks, and ice formations also add texture and tell a story about the scene.
Winter offers a unique canvas for photographers, with opportunities to play with scale, contrast, and natural lines that the snow creates. Incorporating these techniques can transform your winter landscapes from ordinary to extraordinary.
Adding Color to Winter Photos
Incorporating Colorful Subjects Against White Backgrounds
Winter landscapes often appear monochromatic, with endless fields of white snow. However, this creates an excellent opportunity to incorporate colorful subjects that stand out dramatically against the snow. Look for vibrant elements like red berries on a tree, brightly colored clothing on people, or even birds with vivid feathers. These pops of color add interest and can serve as focal points in your composition. Make sure to position them strategically within the frame to draw the viewer’s eye.
Capturing Golden Hour and Blue Hour in Winter
The magic of golden hour—shortly after sunrise and just before sunset—can transform winter scenes with warm, golden hues. The lower angle of the sun during winter months means that golden hour light is even softer and more diffused. This is a fantastic time to capture colorful scenes with deep, long shadows and a warm glow over the snow-covered landscape.
Blue hour, the period of twilight in the morning and evening, offers a different kind of drama. The deep blue tones create a beautiful contrast against the white snow, providing a serene, almost ethereal quality to your images. Capturing these times requires careful planning to ensure you are at the right place just as the light changes.
Using Filters to Enhance Sky Colors
Filters can be incredibly useful tools for enhancing the colors in your winter photos. A polarizing filter can intensify the blue of the sky and reduce glare from the snow, making for richer and more vibrant images. Similarly, graduated neutral density (ND) filters can help balance the exposure between the bright sky and darker ground, allowing the natural colors to pop more effectively.
Always carry a few different filters in your kit and experiment with them to see how they can enhance your scene. Remember, the key to using filters is subtlety—enhance the scene without overdoing it, maintaining a natural look.
With these techniques, you’ll be able to inject life and interest into your winter photos, making the most of the seasonal light and landscape to create captivating images filled with vibrant colors.
Continue honing your skills by focusing on ensuring the longevity of your gear and your comfort in the harsh winter environments.
Focusing in Snowy Conditions
Maintaining Sharp Focus in Low Contrast Scenes
Winter photography often presents challenges in maintaining sharp focus due to the low contrast characteristics of snowy landscapes. Unlike other environments, the monochromatic expanse of snow offers fewer distinct details for the camera’s autofocus system to lock onto. To tackle this, switch to a single autofocus (AF) point mode and manually select the AF point. Aim for elements that provide some contrast such as tree trunks, rocks, or any defined edge within the scene.
Dealing with Snowfall and Autofocus Challenges
Capturing scenes in active snowfall introduces another layer of complexity. Snowflakes can interfere with your camera’s autofocus by diverting its attention away from the intended subject. In such cases, it’s advantageous to toggle to continuous autofocus (AF-C) or AI Servo mode. This setting helps the camera to continually adjust focus as you recompose your shot. If autofocus continues to struggle, don’t hesitate to switch to manual focus to ensure precision.
Manual Focus Techniques for Winter Photography
When autofocus isn’t cutting it, mastering manual focus becomes essential. Utilize your camera’s live view feature to help refine focus. Magnify the screen view to 5x or 10x to ensure pin-sharp detail on your subject. Tools such as focus peaking, if available on your camera, can also assist by highlighting the areas in sharp focus within your frame.
By adopting these techniques, you can navigate common focusing challenges in winter conditions, leading to sharper, more impactful images.
Weather Protection Strategies
Preventing Lens Fog and Condensation
Winter photography often involves extreme temperatures, which can cause lens fog and condensation. To prevent this, store your camera in a sealed plastic bag before bringing it indoors. Allow the camera to warm up gradually to avoid condensation forming inside the lens and body. Another tip is to use lens hoods and anti-fog wipes to keep the front element clear.
Protecting Equipment During Snowfall
Snow can be beautiful, but it’s also a potential hazard to your gear. Use rain covers or waterproof bags specifically designed for cameras. These accessories will shield your equipment from moisture while allowing you to shoot comfortably. Another option is silicone skins, which provide an extra layer of protection against the elements. When shooting in heavy snow, be vigilant about wiping off any snowflakes that land on your camera and lenses.
Acclimating Gear to Temperature Changes
Temperature changes can wreak havoc on electronics, causing condensation and even permanent damage. To acclimate your gear, leave your packed camera bag outside or in a cold car trunk for about 30 minutes before starting your shoot. This allows your gear to slowly adjust to outdoor conditions. Don’t rush this process; a sudden temperature change can be detrimental.
Being prepared with these weather protection strategies ensures your winter photography sessions are successful and your gear stays safe. Next, we will explore how to capture moving subjects amidst winter’s dynamic conditions.
Capturing Moving Subjects
Freezing Falling Snow in Images
Photographing falling snow presents a unique challenge but mastering it can lead to magical images. To freeze the motion of snowflakes, a fast shutter speed is essential. Start with a speed of 1/250 second or faster. Using a higher ISO can help maintain this speed in low light conditions, but be wary of introducing noise. Remember to focus slightly in front of where you want the flakes to be sharp as they are constantly moving towards the lens.
Photographing Winter Sports and Activities
Winter sports are dynamic and exciting to capture. Whether it’s skiing, snowboarding, or ice skating, you’ll want to convey the action and emotions. Use Continuous Autofocus (AI Servo/AF-C) to track moving subjects and set your camera to burst mode to capture multiple shots rapidly. A fast shutter speed (1/1000 second or quicker) will freeze the action, ensuring sharp images of your subject. Experiment with different angles and perspectives to add variety to your shots.
Adjusting Shutter Speed for Different Effects
Managing shutter speed is crucial to capturing the essence of winter scenes. For crisp and sharp images, higher shutter speeds are ideal. However, creatively reducing the shutter speed can yield stunning results. For example, a slower shutter (1/30 second or slower) can be used to create a sense of motion in snowfall or to capture light trails during evening sports events. When experimenting with long exposures, utilize a tripod to avoid camera shake and ensure sharp surroundings while the motion is artistically blurred.
To maximize your potential in winter photography, mastering various aspects of camera settings and techniques is essential. This sets the stage for exploring the subsequent intricacies and adjustments that refine your final images.
Post-Processing Winter Photos
Adjusting Contrast in Snow-Dominated Scenes
Snow scenes often present challenges in post-processing, particularly with contrast. The bright white of the snow can wash out other elements, leading to images that lack depth. To adjust contrast, start by using the Levels or Curves tool in your editing software. These tools allow you to fine-tune the highlights, midtones, and shadows.
- Increase the contrast slightly to make the snow appear more crisp.
- Adjust the midtones to bring out details in both the snow and the scene.
- Use the Curves tool to create a gentle S-curve, which enhances overall contrast without losing detail in the highlights or shadows.
Enhancing Subtle Tones and Textures
Winter scenes can look flat due to the uniform whiteness of the snow, so enhancing textures is critical. Pay attention to the details that make winter landscapes unique, like the patterns created by wind-blown snow or the textures of frozen surfaces.
- Use the Clarity or Texture sliders to emphasize the intricate details.
- Employ selective editing tools like radial filters or adjustment brushes to target specific areas, avoiding global adjustments that can affect the entire image.
- Adjust the Shadows and Highlights sliders to reveal hidden details and bring out the subtle tones.
Maintaining Natural-Looking Snow Colors
One of the biggest challenges in post-processing winter photos is maintaining the natural color of snow. Snow often appears blue or gray in photos, which can detract from the overall aesthetic.
- Correct the white balance first. Adjust the temperature slider to warm up or cool down the image until the snow looks white rather than blue or gray.
- Use the Hue/Saturation/Luminance (HSL) panel to fine-tune the colors further. You can decrease the saturation of blues while increasing the luminance to make the snow appear more natural.
- Apply selective color adjustments to ensure other colors in the scene remain accurate and visually appealing.
By mastering these post-processing techniques, you will be able to enhance the beauty and authenticity of your winter photos, bringing out the best in the snowscapes you capture.
Next, we’ll explore how to stay safe and well-prepared for winter photography adventures, ensuring your experience is both enjoyable and secure.
Safety and Planning
Checking Weather Conditions before Shoots
Before you venture out for a winter shoot, it’s crucial to check the weather conditions. Accurate and up-to-date weather information helps you prepare for the environment you’ll be working in. Utilize weather apps or websites to monitor temperature, wind speed, and snow forecasts. This ensures you’re aware of any sudden weather changes that could affect your safety or your equipment. By staying informed, you can avoid getting caught in severe weather, ensuring you have the necessary gear and clothing for the conditions.
Preparing Emergency Kit for Winter Photography
An emergency kit is indispensable when photographing in winter conditions. Include the following essentials:
- Extra batteries and a power bank
- Hand warmers and feet warmers
- A high-energy snack and water
- A multi-tool or knife
- A first aid kit
- An emergency blanket and whistle
Having these items on hand allows you to handle unexpected situations, from equipment failures to physical ailments. It’s also wise to let someone know your location and expected return time.
Planning Shoot Locations and Timing
Scouting locations and understanding the lighting conditions of your chosen spots is vital. Winter sunrises and sunsets can be brief yet stunning, providing beautiful natural light for your captures. Plan to arrive early, giving yourself ample time to set up and explore different angles. Consider using apps to track the sun’s path and plan your shots around the golden and blue hours for the best lighting.
Preparation ensures that you can take advantage of fleeting moments of perfect light and stunning backdrops unique to winter scenes. By checking the weather, preparing an emergency kit, and planning your shoot locations and timing, you’ll be well-equipped for a successful winter photography outing.



