
Understanding Maple Trees and Sap Production
Different Species of Maple Trees Suitable for Syrup Production
The world of maple syrup production is diverse, with several species of maple trees primarily prized for their sap. The most popular species include the Sugar Maple (Acer saccharum), known for its high sugar content in the sap. The Black Maple (Acer nigrum) is closely related to the Sugar Maple and also produces excellent syrup, although its range is more limited. Other species like the Red Maple (Acer rubrum) and Silver Maple (Acer saccharinum) can also be tapped, but their sap typically has a lower sugar concentration, requiring more boiling to produce syrup.
Optimal Conditions for Sap Flow and Seasonal Timing
Sap flow in maple trees is a seasonal phenomenon strongly influenced by weather conditions. For optimal sap production, the days should be above freezing, while the nights should drop below freezing. This freeze-thaw cycle creates pressure within the tree, causing the sap to flow more readily when the temperature rises during the day. In the Catskills region, this period typically occurs from late February to early April. Proper timing is crucial, as tapping too early or too late can result in reduced sap yields and sap quality.
Basic Biology of How Trees Produce and Store Sap
Understanding the biology of maple trees helps explain why sap production varies. During the growing season, trees produce sugars through photosynthesis, which are then stored as starch in the trunk and roots. In late winter and early spring, the starches are converted back into sugars and dissolved in the sap. When the weather conditions are right, this sugary sap moves up from the roots to nourish the tree, making it available for collection.
With a grasp of the maple trees and sap production process, it’s time to explore the tools and equipment essential for sap collection, ensuring a smooth and efficient tapping season.
Essential Tools and Equipment for Sap Collection
Traditional vs Modern Tapping Equipment and Their Benefits
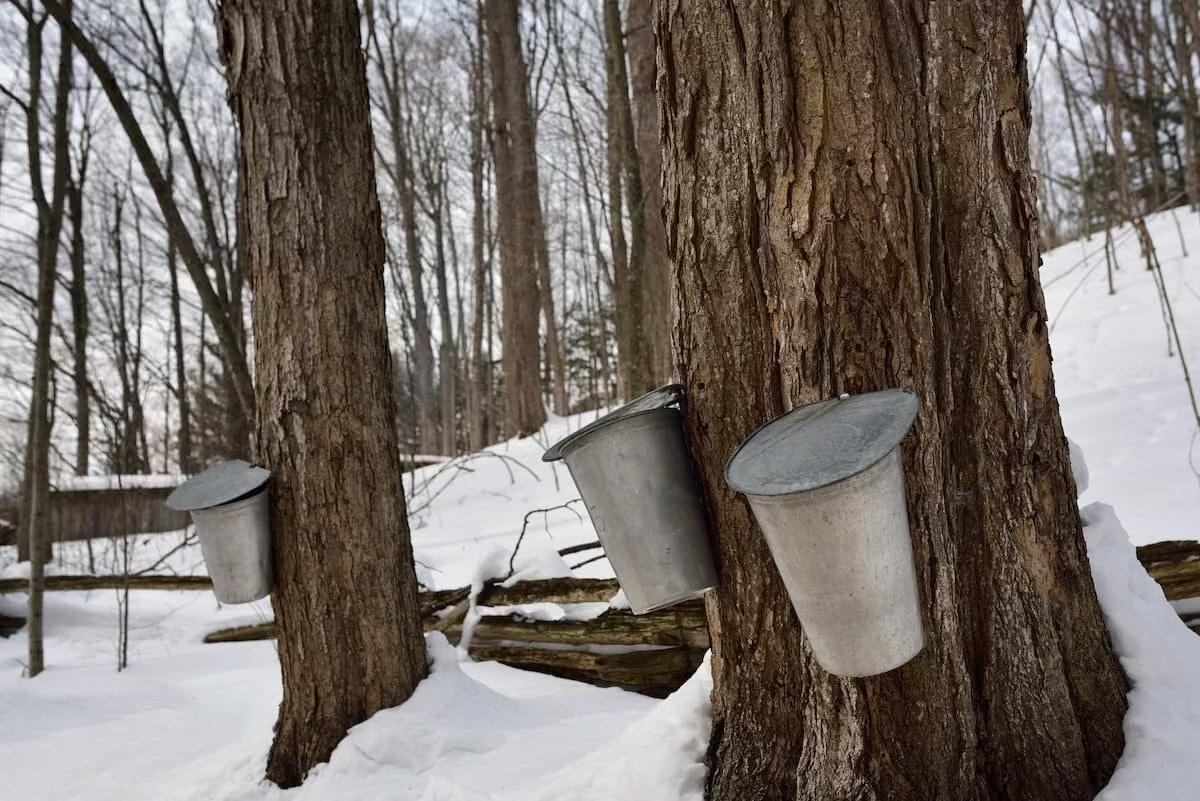
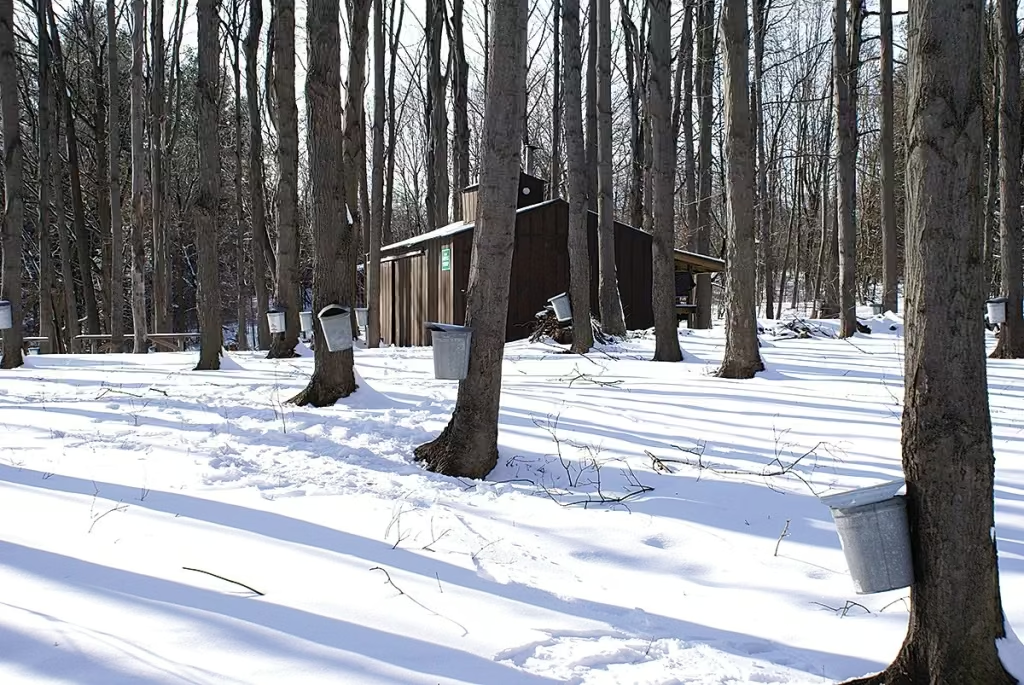
When it comes to tapping maple trees, choosing the right tools can make a world of difference. Traditional tapping equipment includes metal or wooden spiles, which are inserted into drilled holes in the tree. Buckets are then hung from the spiles to collect the dripping sap. While this method has been used for generations and offers a charming, hands-on experience, it does have limitations in terms of efficiency and scalability.
Modern tapping systems use plastic tubing connected to spiles, creating a network that directs sap into a central collection tank. This method reduces labor because it doesn’t require daily collection and allows for larger-scale operations. Plus, the closed system minimizes contamination from external debris, enhancing sap quality.
Sanitation and Maintenance Requirements for Collection Equipment
Whether you opt for traditional or modern equipment, maintaining sanitation is crucial. Contaminated sap can spoil the entire batch of syrup. For spiles and buckets, clean them thoroughly with hot water and a mild detergent, then rinse well and let them dry completely before storage. Modern tubing systems should be flushed with an appropriate sanitizing solution at the end of the tapping season to prevent microbial growth.
Routine inspections are also vital. Check for damage or wear and tear, as even a small crack in a bucket or a broken tube can lead to lost sap and contamination. Proper maintenance ensures that your equipment will last for many seasons.
Storage Containers and Transportation Methods in the Catskills Region
Storing and transporting sap efficiently is essential, especially in the Catskills, where the terrain can be challenging. Stainless steel and food-grade plastic containers are popular choices for temporary sap storage due to their durability and ease of cleaning. Make sure these containers have tightly sealing lids to prevent contamination.
For transportation, using food-grade plastic barrels or large containers in the back of a truck or trailer is recommended. In the Catskills, roads can be narrow and winding, so secure the containers well to avoid spillage. A cooler climate in this region provides a slight advantage in maintaining sap temperature during transportation, helping to preserve its quality until it can be processed into syrup.
The Art of Tapping Maple Trees
Proper Technique for Drilling Tap Holes and Inserting Spouts
Tapping maple trees is both an art and a science. To drill a tap hole, use a clean, sharp drill bit to make a hole about 1.5-2 inches deep, slanting slightly upward to help the sap flow more easily. Ensure the diameter of the hole matches the size of the spout you intend to use. Insert the spout gently but firmly using light taps with a hammer until it is snugly fitted, avoiding any cracks in the tree. Properly drilled holes and inserted spouts ensure efficient sap collection.
Identifying the Best Locations on Trees for Maximum Sap Flow
Selecting the right location on the tree is crucial for optimal sap flow. Target areas that are sunny, as warmth stimulates sap flow. Choose spots at least 2 feet above the ground and 1 foot from previous tap holes to avoid wounding the tree excessively. Tapping the south side of the tree, which gets more sunlight, often results in higher sap yield. Healthy trees with a diameter of at least 10-12 inches work best for tapping.
Sustainable Tapping Practices to Protect Tree Health
Sustainability is key to long-term syrup production. Ensure that you do not over-tap your trees – a general rule is one tap per 10 inches of tree diameter, with a maximum of three taps per tree. Use clean tools to prevent infections and allow the tap holes to seal naturally by removing the spouts at the end of the season. Additionally, rotating tapping locations each season helps protect the tree’s health and longevity.
By mastering these techniques, you can ensure a bountiful sap harvest while keeping your maple trees healthy. As we move forward, we’ll explore effective methods for collecting and storing that precious sap.
Collection Methods and Storage
Traditional Bucket Collection vs. Modern Tubing Systems
When it comes to collecting sap, traditional bucket collection and modern tubing systems each have their advantages. Traditional bucket collection involves hanging galvanized or food-grade plastic buckets on spiles, which are inserted into tap holes. This method allows for easy monitoring of individual trees and provides a tangible connection to the centuries-old practice of maple syrup production.
Modern tubing systems, however, offer greater efficiency and scalability. Tubing is connected to each spile and runs directly to a central storage tank, which reduces the labor required for manual collection. These systems are particularly beneficial for large maple stands, where many trees need to be tapped. Tubing also helps maintain sap quality by minimizing exposure to contaminants and reducing the time sap is exposed to external conditions.
Maintaining Sap Quality During Collection Process
Maintaining the quality of sap during collection is crucial for producing high-quality syrup. Ensure all equipment, whether buckets or tubing, is thoroughly cleaned and sanitized before use. Contaminated equipment can introduce bacteria or mold, decreasing sap quality and potentially spoiling the syrup.
Regularly monitor sap collection points to ensure they are not contaminated by debris or insects. Filtering sap as it is collected, especially when using buckets, can help maintain purity. For those using tubing systems, periodic flushing with clean water ensures the lines remain free of blockages and contaminants.
Best Practices for Temporary Storage Before Processing
Once collected, sap must be stored properly to prevent spoilage until it can be processed. Sap should be kept cool, ideally at temperatures below 38°F (3°C), to slow the growth of bacteria and yeast. This is particularly important in the variable weather conditions of the Catskills.
Use food-grade plastic or stainless steel containers for temporary storage. These materials prevent contamination and can be easily cleaned and sanitized. Make sure storage containers are covered to avoid debris and insects from getting in. If sap is not processed within a few days, it should be refrigerated or kept in a shaded area with occasional stirring to maintain quality.
As we understand the importance of choosing the right collection method and maintaining sap quality, we are ready to move on to the next steps in transforming sap into syrup.
The Boiling Process: Transforming Sap to Syrup
Setting Up an Efficient Evaporation System
To turn sap into syrup, you need an efficient evaporation system. The common setup includes an evaporator pan or series of pans, often made of stainless steel for durability and heat resistance. The sap is poured into the pan and heated. Many modern systems use continuous flow pans with dividers, allowing sap to move through the sections, gradually thickening as it approaches the draw-off point.
Make sure to set up your evaporator in a well-ventilated area to handle the large steam output. Some setups include pre-heaters, which warm the incoming sap using the steam produced by the evaporation process, increasing efficiency.
Monitoring Temperature and Density During Boiling
Consistent and careful monitoring of the boiling sap is crucial. Maintain a rolling boil, generally at temperatures around 219°F (104°C). Equip your setup with a dependable thermometer and hydrometer. The latter measures the density of the sap and helps determine when the syrup is near completion.
During the boiling process, regularly check the syrup’s density. A sap hydrometer reads Brix, which indicates sugar content. Traditional practice suggests the syrup is done when it reaches about 66-67 Brix.
Identifying the Perfect Moment to Finish the Syrup
Timing is everything in syrup production. The syrup is ready to draw off when it reaches the right temperature and Brix level. Sap boils at about 7°F (4°C) above the boiling point of water, but elevation and weather conditions can slightly affect this.
Once the hydrometer indicates the correct Brix level and the temperature holds steady, it’s time to remove the syrup from the heat. Immediately filter the syrup to remove niter (sugar sand), which naturally forms during boiling. This ensures a clear final product.
As you master the art of boiling, you’ll develop a keen sense of the subtle changes indicating when syrup is ready. Proper timing not only affects quality but also enhances the distinctive flavor and color of maple syrup.
Maintaining attention to every detail can transform sap into the liquid gold that is maple syrup.
Transitioning from the boiling process, our focus will shift to the next critical steps in syrup production.
Filtering and Finishing Techniques
Different Filtering Methods to Achieve Crystal-Clear Syrup
Once your maple syrup has reached the ideal density, filtering out impurities is crucial to achieving that appealing, clear final product. The most common impurities are natural minerals, known as “sugar sand” or niter, which can cloud the syrup. Here are some popular filtering methods:
- Cheesecloth: The simplest and oldest method involves pouring the syrup through several layers of cheesecloth. While it effectively removes larger particles, finer impurities may pass through.
- Orlon and Wool Filters: These filters are more effective at removing niter and small particles. Orlon filters are synthetic and reusable, while wool filters are natural.
- Filter Press: For larger operations, a filter press is a great investment. It uses filter papers and pressure to achieve high clarity without multiple passes.
Grading and Quality Assessment of Final Product
Grading syrup involves assessing its color and flavor, which can vary depending on the sap’s collection period within the season. Syrup is graded on a scale ranging from light to dark:
- Golden Color and Delicate Taste: Typically produced early in the season, this syrup has a light, sweet flavor.
- Amber Color and Rich Taste: Mid-season syrup, darker and richer than golden.
- Dark Color and Robust Taste: Made later in the season, this syrup has a strong maple flavor.
- Very Dark Color and Strong Taste: The end-of-season syrup, very dark and robust in flavor.
When grading syrup, ensure it’s also free from off-flavors and has the correct density (66-68 Brix) measured using a hydrometer or refractometer.
Proper Bottling and Storage Procedures
After filtering and grading, proper bottling and storage are vital to maintain your syrup’s quality. Here are the key steps:
- Sterilize Bottles: Clean and sterilize bottles to avoid contamination. Use either a hot water bath or a commercial sanitizer.
- Hot Packing: Fill bottles with syrup while it’s still hot (around 180°F/82°C). This ensures the bottles seal properly and prevents spoilage.
- Seal and Cool: Immediately seal the bottles to create a vacuum. Allow them to cool at room temperature before storage.
Store your syrup in a cool, dark place. If unopened, syrup can last for a couple of years. Once opened, refrigerate it to keep it fresh.
Having mastered these filtering and finishing techniques, you’re well on your way to producing high-quality maple syrup, ready for the market or your breakfast table.
Quality Control and Flavor Enhancement
Ensuring the quality and enhancing the flavor of maple syrup is a meticulous process that involves several essential steps, from rigorous testing methods to troubleshooting common problems. Here’s what you need to know:
Testing Methods for Quality Assurance
To guarantee that your syrup meets the highest standards, consistent testing is crucial. Several methods can help ensure the quality and purity of your syrup:
- Hydrometer Tests: Use a hydrometer to measure the density of your syrup. The ideal Brix level for maple syrup is 66-67. If the syrup is too dense, it can crystallize, while less dense syrup may spoil.
- Thermometers: Monitor the boiling point using a thermometer. The perfect finishing point for syrup is 7.1°F (3.94°C) above the boiling point of water.
- Refractometers: These devices measure the sugar content and provide an accurate indication of the syrup’s quality.
- Clarity Tests: Utilize filters and check for sediment. Cloudy syrup may indicate the presence of niter, which can affect quality.
Factors Affecting Syrup Flavor and Color
The flavor and color of maple syrup can vary widely, influenced by several factors:
- Tree Age and Health: Older trees and those in good health typically produce sap with a richer flavor.
- Soil and Environment: The mineral content and composition of the soil where trees grow affect the sap’s characteristics.
- Weather Conditions: Temperature fluctuations during the sugaring season impact sap flow and its sugar content.
- Boiling Process: The temperature, the duration of boiling, and the equipment used all play roles in determining the syrup’s final flavor and color.
Common Problems and Troubleshooting Solutions
Despite your best efforts, issues may arise during syrup production. Here’s how to address some of the most common problems:
- Crystallization: If your syrup crystallizes, it might be due to too high a sugar concentration. Reheat the syrup with water to dissolve the crystals and balance the sugar level.
- Cloudy Syrup: Cloudiness is often caused by niter (sugar sand). Filter the syrup thoroughly using techniques such as cheesecloth, Orlon, wool filters, or a filter press.
- Off Flavors: Off flavors can result from microorganisms or impurities. Always ensure equipment is sanitized properly, and store sap at cooler temperatures to prevent fermentation.
Maintaining high standards of quality and addressing challenges swiftly ensures that the syrup is both delicious and marketable. With these practices in place, you can produce exceptional maple syrup that stands out in flavor and clarity.



