
Introduction: Why Sharing Your BDR Action Camera Videos Matters
Adventure Content Is Everywhere
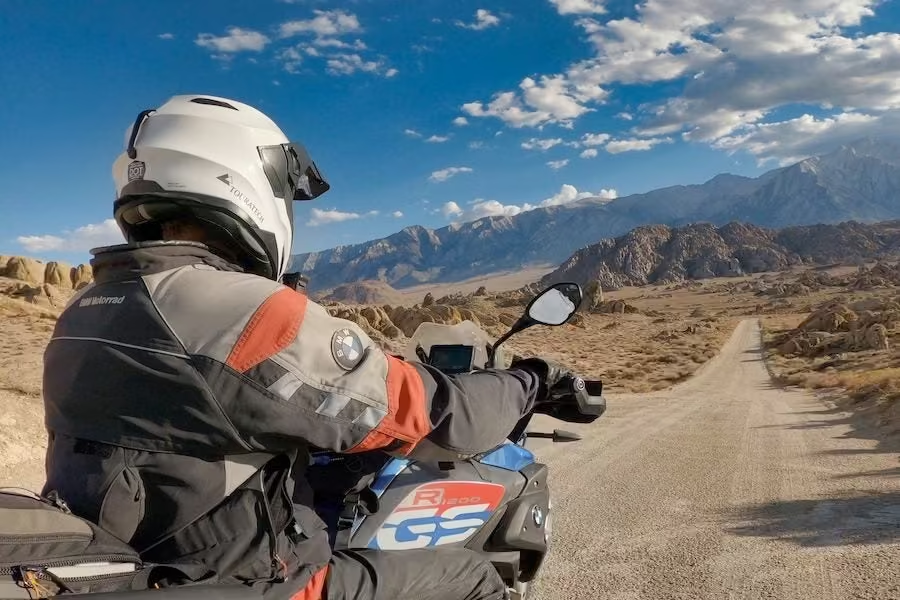
Action cameras have exploded in popularity. More people than ever are capturing wild hikes, cycling trips, and stunning underwater scenes. Online platforms overflow with this high-energy content, drawing in viewers from around the world. Whether you’re an experienced creator or just getting started, joining this movement opens up exciting possibilities. BDR riders can capture amazing content on their back country trips.
Inspiring and Documenting Your Journey
When you share your videos, you’re not just posting for fun. You might motivate someone to try a new activity or travel to a new place. Your footage becomes a visual diary, preserving memories for yourself and others. Each shared clip builds your story and can spark real enthusiasm in your audience.
Making Sharing Simple and Effective
This tutorial takes you through the best ways to edit, export, and share your adventure videos. You’ll learn tools and tips to get your content online smoothly, with minimal fuss. Ready to get your footage noticed? Let’s get started.
Getting Your Footage Ready: Basic Editing Essentials
Editing your action camera footage doesn’t need to be complicated. Start by trimming your raw videos—cut out moments where nothing happens and keep just the exciting or essential parts. Tools like GoPro Player and other beginner-friendly software make this step almost effortless.
Next, pick the clips that really tell your story, whether it’s your epic jump or that breath-taking view at the top. Focusing on a few great moments keeps your video tight and watchable.
Enhance your selected clips with a few basic tweaks. Use stabilization tools to smooth out shaky shots and apply simple color correction features, so your footage looks crisp and vivid. With these quick edits, your adventure will be ready to wow viewers.
Now, let’s keep your footage looking sharp as you get it ready for the web.
Optimizing Video Quality for Online Sharing
Picking the Right Resolution and Frame Rate
Before uploading, consider where your video will be shared. For YouTube, 1080p (Full HD) or 4K is best—these resolutions look sharp on any device. Instagram and TikTok often favor vertical videos, so 1080×1920 (vertical Full HD) is a smart choice. For smoother motion, aim for 30 or 60 frames per second, but remember higher frame rates mean larger files. For most platforms, 30 fps is a safe and efficient bet.
Export Settings: Quality vs. File Size
You want viewers to see crisp shots without waiting hours for uploads. When exporting, choose H.264 as your codec—this format strikes a good balance between quality and manageable file size. Set the bitrate to “auto” or around 15-20 Mbps for 4K, and 8 Mbps for 1080p. Avoid exporting at higher settings than your original footage; it won’t improve quality and just makes files bigger.
Selecting the Best File Format
MP4 is the most friendly and widely accepted format online—it works almost everywhere without issues. MOV is also fine but tends to be larger, so only choose it if a specific platform requests it. Always check what your platform supports before uploading to avoid conversion headaches.
Optimizing your video lets your edits shine wherever your adventure takes viewers next.
Platform-Specific Tips for YouTube Uploads
Uploading Your Adventure Footage
First, log in to your YouTube account and click the “Create” button, then select “Upload video.” Choose your freshly exported MP4 file, ideally in 1080p or 4K, to ensure quality. As the file uploads, fill in the details section.
Titles, Descriptions, and Tags
Keep your video title clear and catchy—reflecting the adventure or location. In your description, add context about what viewers will see, and use relevant keywords naturally without stuffing. Tags are helpful too; include phrases connected to your activity, camera, and location for better discoverability.
YouTube-Specific Settings
Before publishing, double-check your video’s privacy settings. Choose a custom thumbnail that stands out. Turn on HD processing if available to get the sharpest playback. Finally, select an engaging playlist or category to help viewers find similar videos.
Now your edited adventure is ready for the world to see.
Sharing on Social Media Platforms
Platform Requirements and Video Format Basics
When uploading to Instagram, Facebook, or TikTok, each platform has its own video specs. Instagram prefers vertical (9:16) for Stories and Reels, but square (1:1) also works well in your feed. Facebook is flexible—vertical and horizontal both look great, but try to upload in 1080p for clarity. TikTok thrives on vertical video (9:16) and short, punchy edits, with 1080p always a safe bet. Most platforms accept MP4 files with H.264 codec for reliable playback and fast uploads.
Creating Platform-Optimized Clips
Break your long adventure into a few dynamic highlights. Trim down clips to 15-60 seconds for Instagram Reels and TikTok. For Facebook, you can go a bit longer, but bite-sized content typically attracts more engagement. Use built-in editors or apps like GoPro’s Quik to crop and resize for each platform’s format without losing quality.
Boosting Engagement
Capture interest in the first seconds—show your wildest moment first. Add captions or stickers using app editing tools to make your video pop, even with the sound off. Use relevant hashtags to reach adventure-loving audiences. Respond to comments quickly to build real connections and keep the conversation going.
Strong, eye-catching visuals paired with active engagement help your clips stand out and attract fellow enthusiasts.
Advanced Sharing Techniques for Enthusiasts
Showcasing your best moments means going beyond simple edits. Highlight reels are a great way to bring together epic scenes from multiple adventures. Use your editing software to trim standout shots, then sequence them to build excitement and tell a cohesive story. Add music for extra energy—choose tunes that match your video’s mood and pace for the most impact.
To give your videos a professional touch, use text overlays to introduce locations, dates, or add playful commentary. Smooth transitions between clips help maintain flow and keep viewers engaged. Finally, don’t underestimate the power of a bold thumbnail or cover image—vivid visuals entice viewers to press play, making your adventures impossible to ignore.
With these techniques, your videos become more dynamic and memorable, standing out in any feed.
Troubleshooting Common Sharing Problems
Solutions for Upload Failures and Processing Issues
Action camera videos are large and rich in detail, but that sometimes leads to upload errors. First, check your internet connection and try refreshing your browser or restarting the app. If that doesn’t help, compress your video with user-friendly tools or export to a widely supported format like MP4. Make sure your file isn’t corrupted—play it locally to be sure. If uploads still fail, try a different browser, or clear cache and cookies before another attempt.
Handling Large Files and Slow Internet
Uploading big adventure files on a slow network is frustrating. To tackle this, adjust your export settings—lower the resolution or shorten the clip. For very large files, consider transferring your video with a wired connection or overnight, when the internet is faster. Use cloud storage as an alternative when direct uploads struggle.
Fixing Quality Issues After Uploading
Sometimes, videos lose quality after uploading. Check platform-specific settings; some sites compress videos. Always upload the highest quality allowed by each platform. If viewers see blurry playback, remind them to select HD in the video player settings. Refresh your browser or app for the latest changes in quality.
Small changes to your process help you avoid the most common headaches and focus on sharing your adventures with ease.
Building Your Adventure Video Community
Connect With Fellow Enthusiasts
Once your action camera footage is online, start building real connections with people who share your passion. Reply to comments and questions to show viewers you value their input. Share your experiences and invite others to share their tips or favorite spots. This open exchange turns casual viewers into an active community.
Harness Hashtags and Online Groups
Expand your reach with relevant hashtags like #adventurecam or #bikelife. Join online groups and communities where people love adventure content. Share your highlights, but also engage with others’ work—offer praise, ask questions, and join discussions. Exposure grows fastest when you’re both a creator and a fan.
Collaborate and Create Together
Look for opportunities to team up with fellow adventurers. Collaborations, guest features, or video challenges introduce your content to new audiences. By supporting and working with others, you amplify the sense of community around your adventures.
Connecting with others reinvigorates your creativity and helps your videos inspire more people.
Conclusion: Taking Your Action Camera Content to the Next Level
Sharing your action camera adventures is about more than the footage itself—it’s about connection. By following the steps for editing, optimizing, and sharing, you set your content up for success. Remember, each platform offers unique ways to showcase your style and creativity. Don’t be afraid to try new formats or experiment with community features. Engaging with fellow creators and viewers builds a sense of belonging and can spark new ideas. As you keep sharing, you’ll find your voice and inspire others along the way. Embrace your journey, stay curious, and let your adventures bring others along for the ride.



